When using the BlackFog on more recent Android versions (8.0 or later) you may notice Android not blocking all advertising or data collection activities. There are two distinct settings that may need to be changed as described below.
Private DNS
When using Android 9 Pie or above there is a new setting called Private DNS which routes DNS over SSL at the system level. This needs to be switched off in order for BlackFog to function correctly.
Settings > Network & Internet > Advanced > Private DNS > OFF
Once you toggle this option to off (the default) you should notice that BlackFog correctly blocks as it should and the counters will start to increment normally as you browse. If it does not you may also need to modify the Chrome settings for async DNS as described below.
Async DNS
Recent versions of Chrome shipping with Android now include a feature called asynchronous DNS. This is a DNS client included by default within the Chrome browser that was previously inactive. This feature bypasses the system level DNS resolution and stops some of the malware blocking included in BlackFog. This feature uses SSL based DNS resolution to bypass on-device filtering. We are working on an update that works around this issue for newer devices, but in the mean time you can simply disable it.
If you run Android 9.0 or later we recommend that you disable this feature within the Chrome browser.
To Disable on Android:
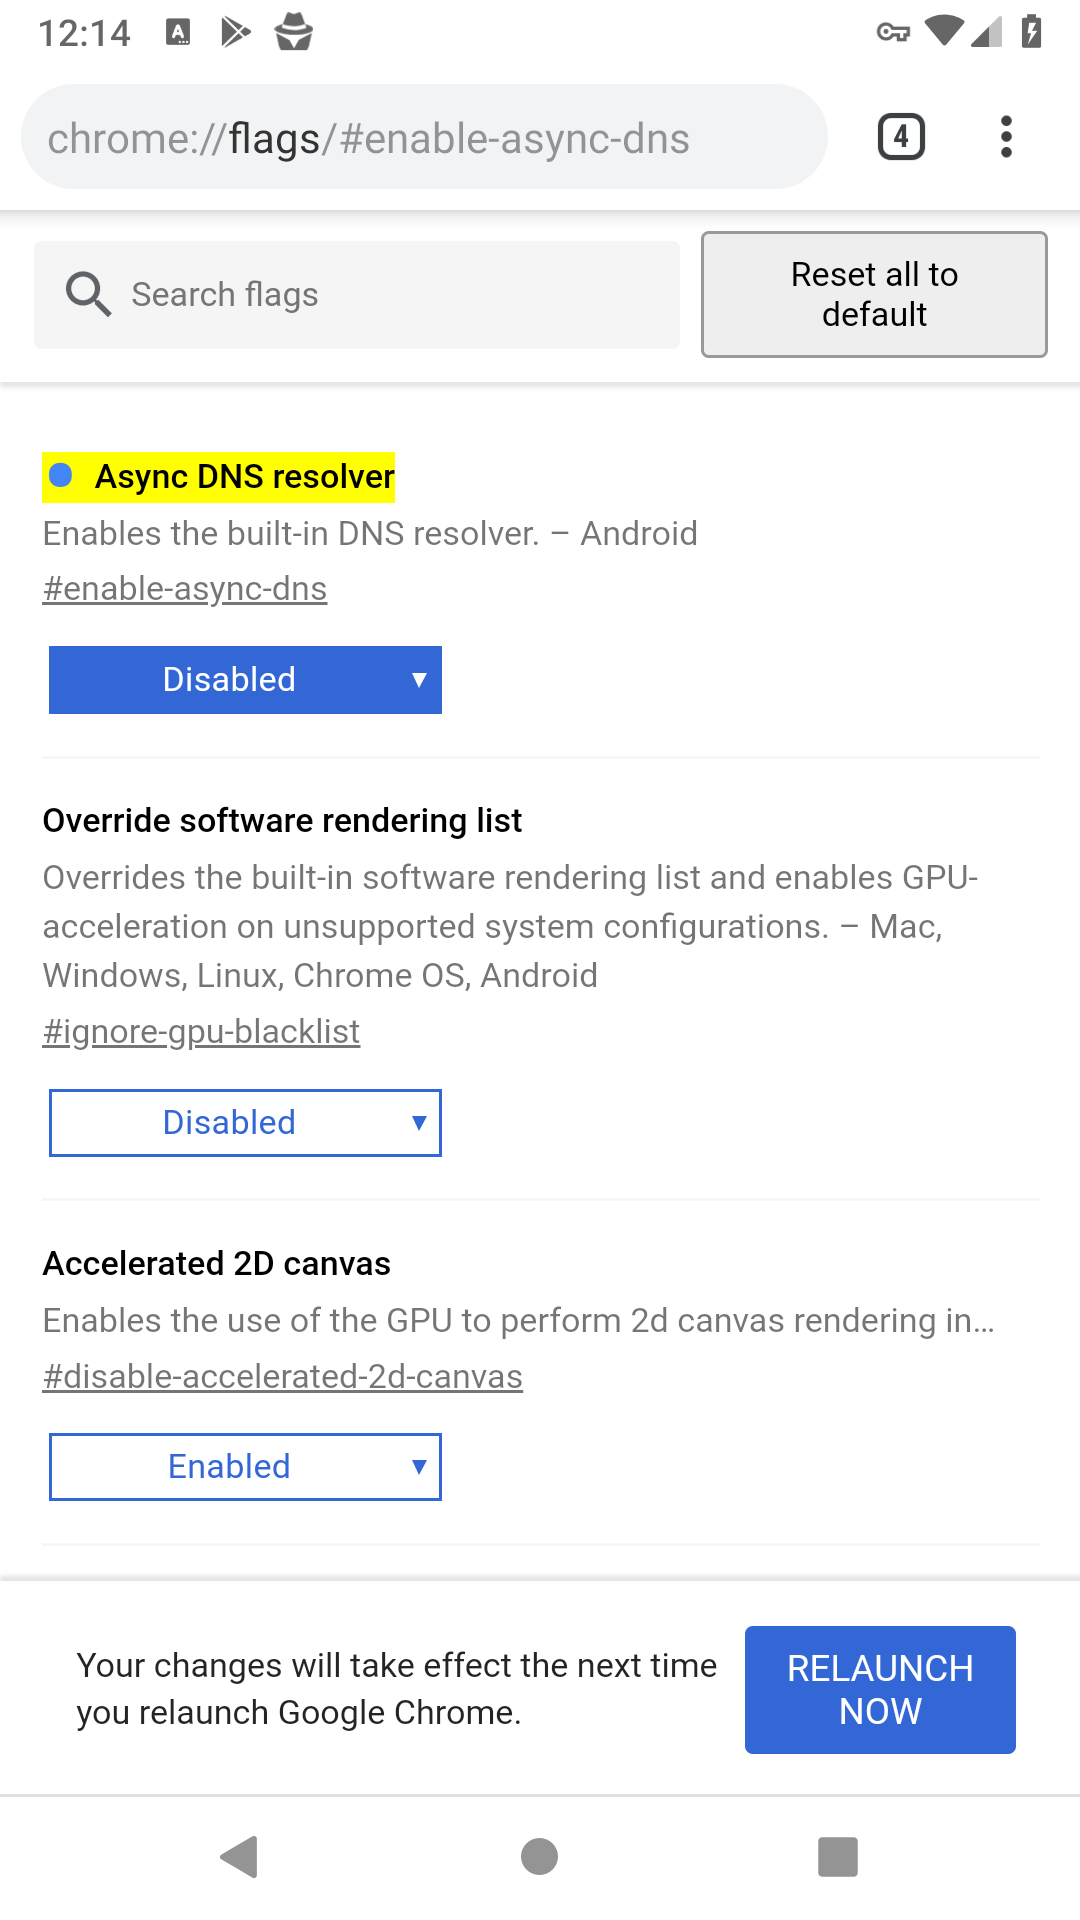
- Open “chrome://flags/#enable-async-dns”
- Change option to “Disabled”
- Click “Relaunch Now” at the bottom of the page.
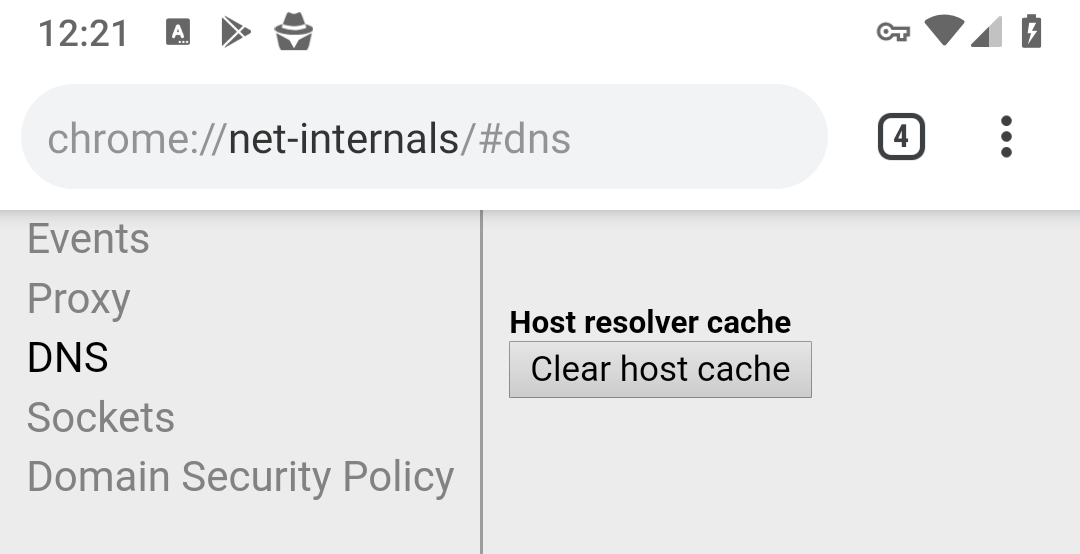
- After relaunch open “chrome://net-internals/#dns”
- Click “Clear host cache”


